How to integrate with Zapier

Requirements

  • Zapier Accounts (Free or Paid)

    • Generally, one account per team is recommended. Use a group email (e.g., [email protected]) to sign up and manage all Zaps your team uses from a single account.
  • API Key

Commonly used Zaps

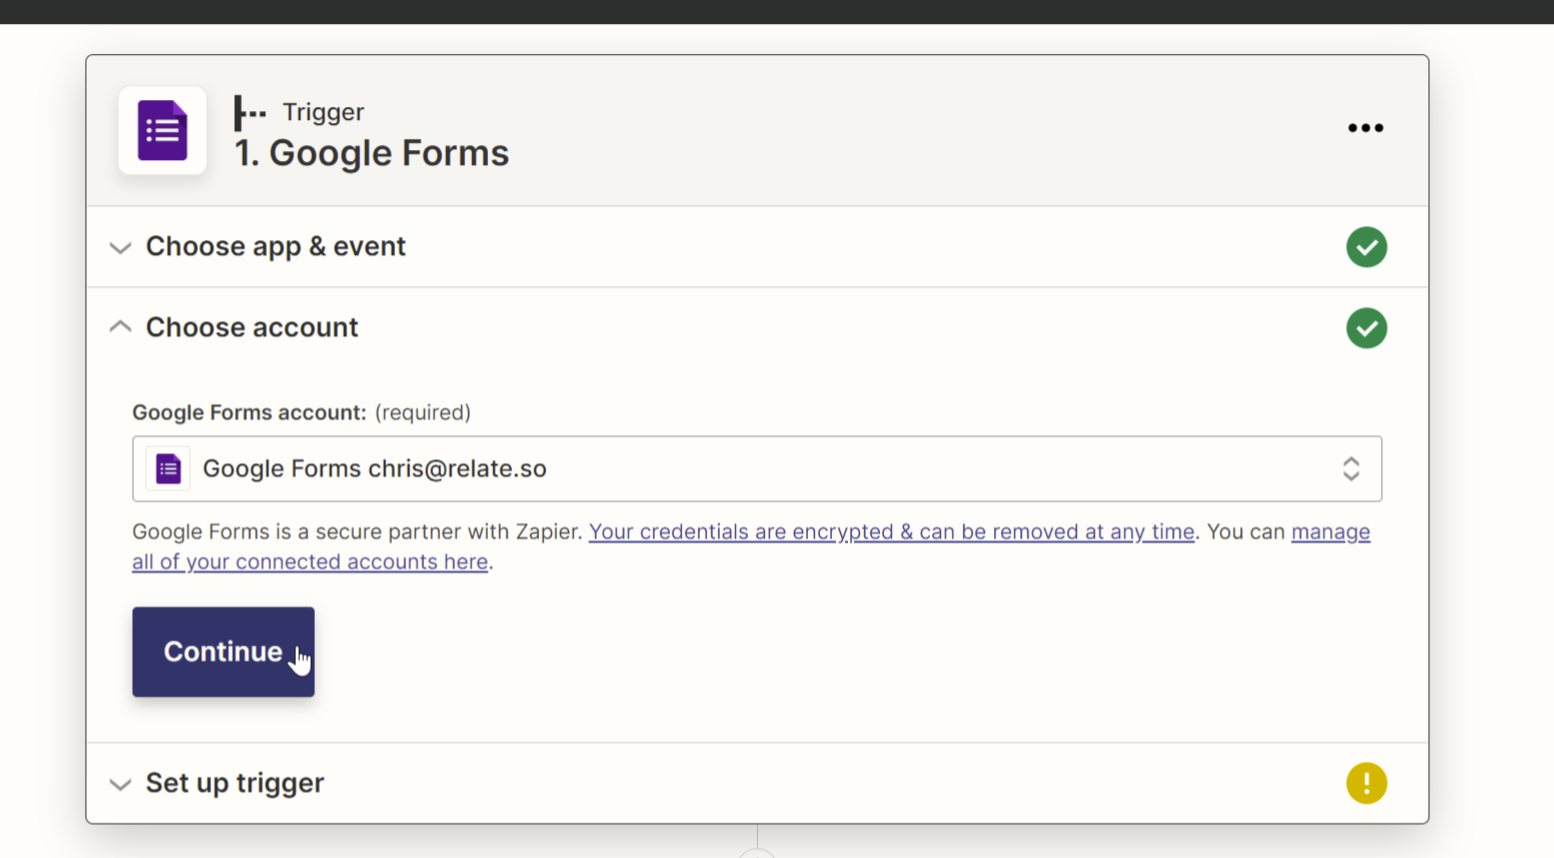
1. Connect Relate to Zapier

First, find and select Relate and another application you want to connect it with.
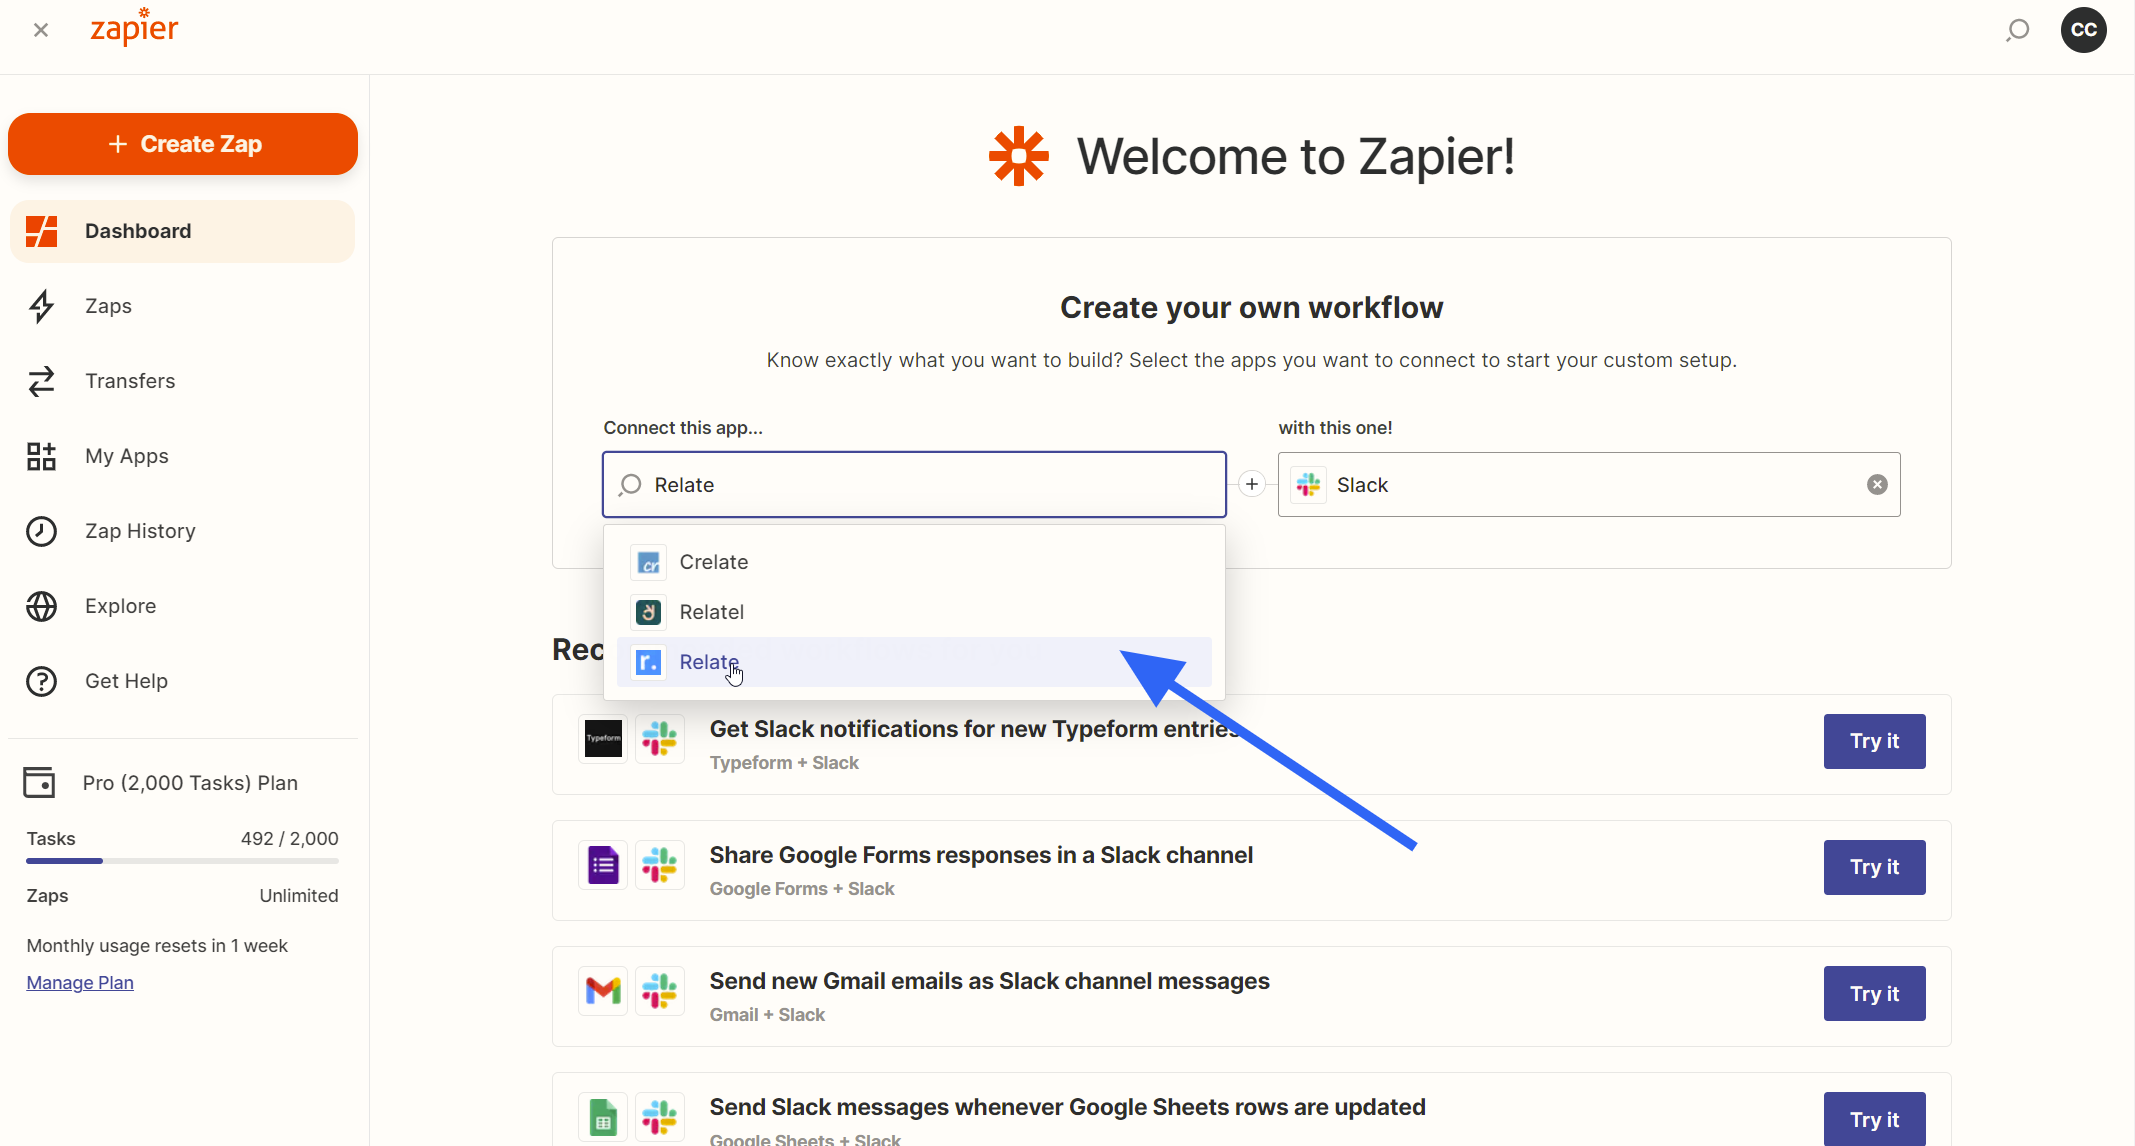
Connect Relate to Zapier

2. Create a Zap

Relate provides both triggers and actions, so you can create a Zap based on the use case.

In this guide, we will cover a use case that automatically creates a lead in Relate from the data received through Google Forms. It also creates a deal and a note. In addition, it supports linking with various tools such as Mailchimp, Calendar, Google Calendar, Slack, etc.

3. Add Trigger

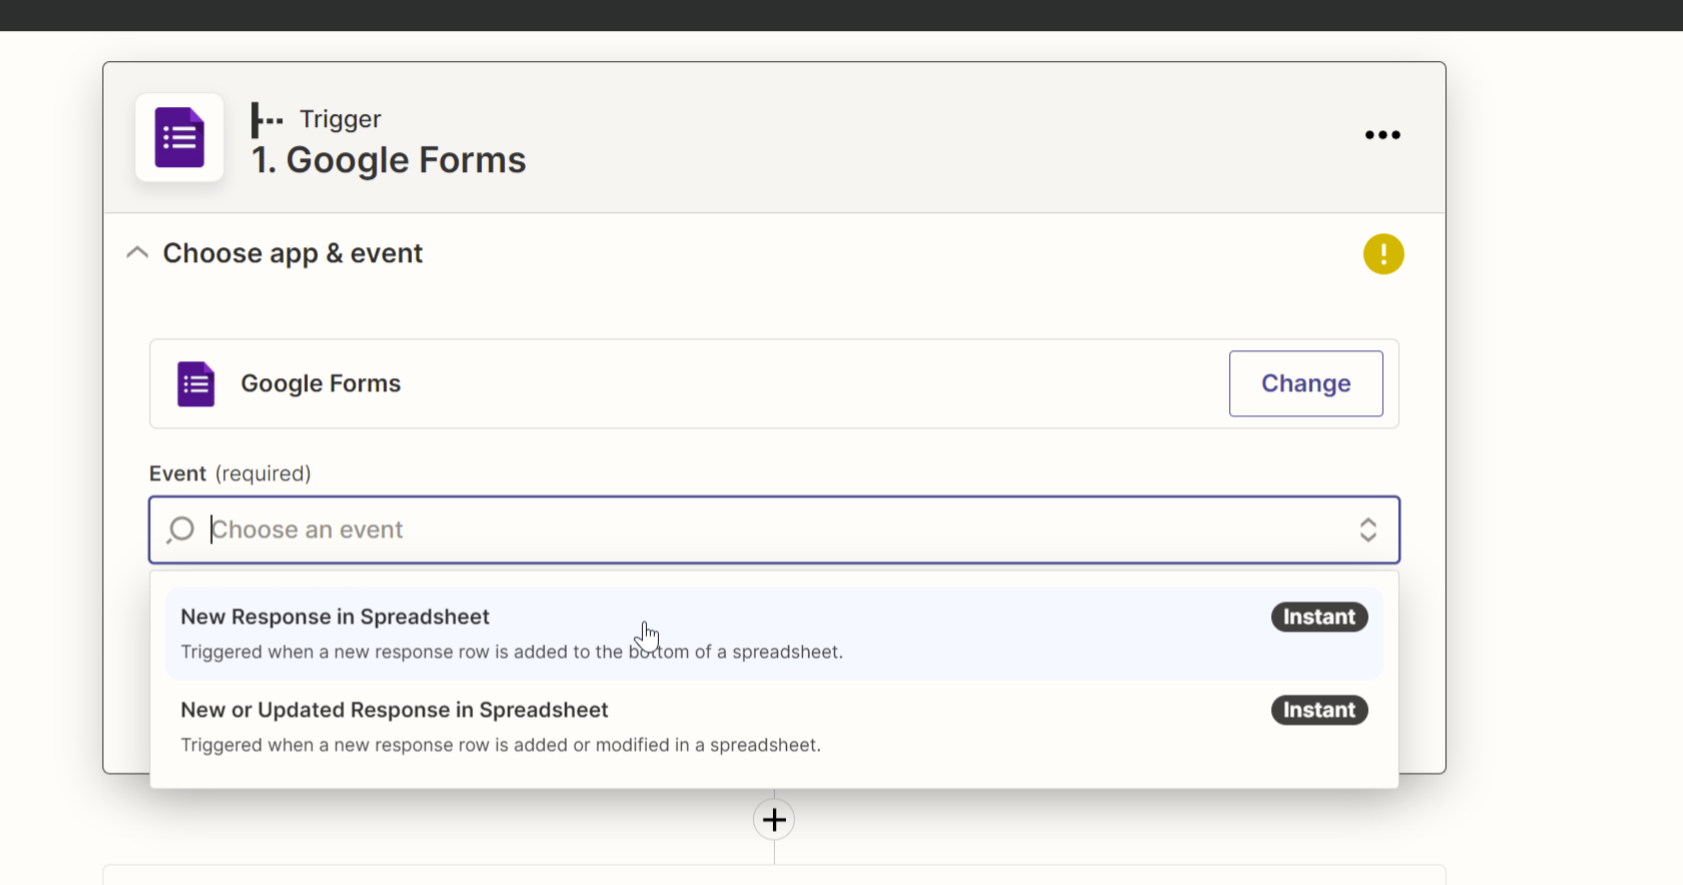
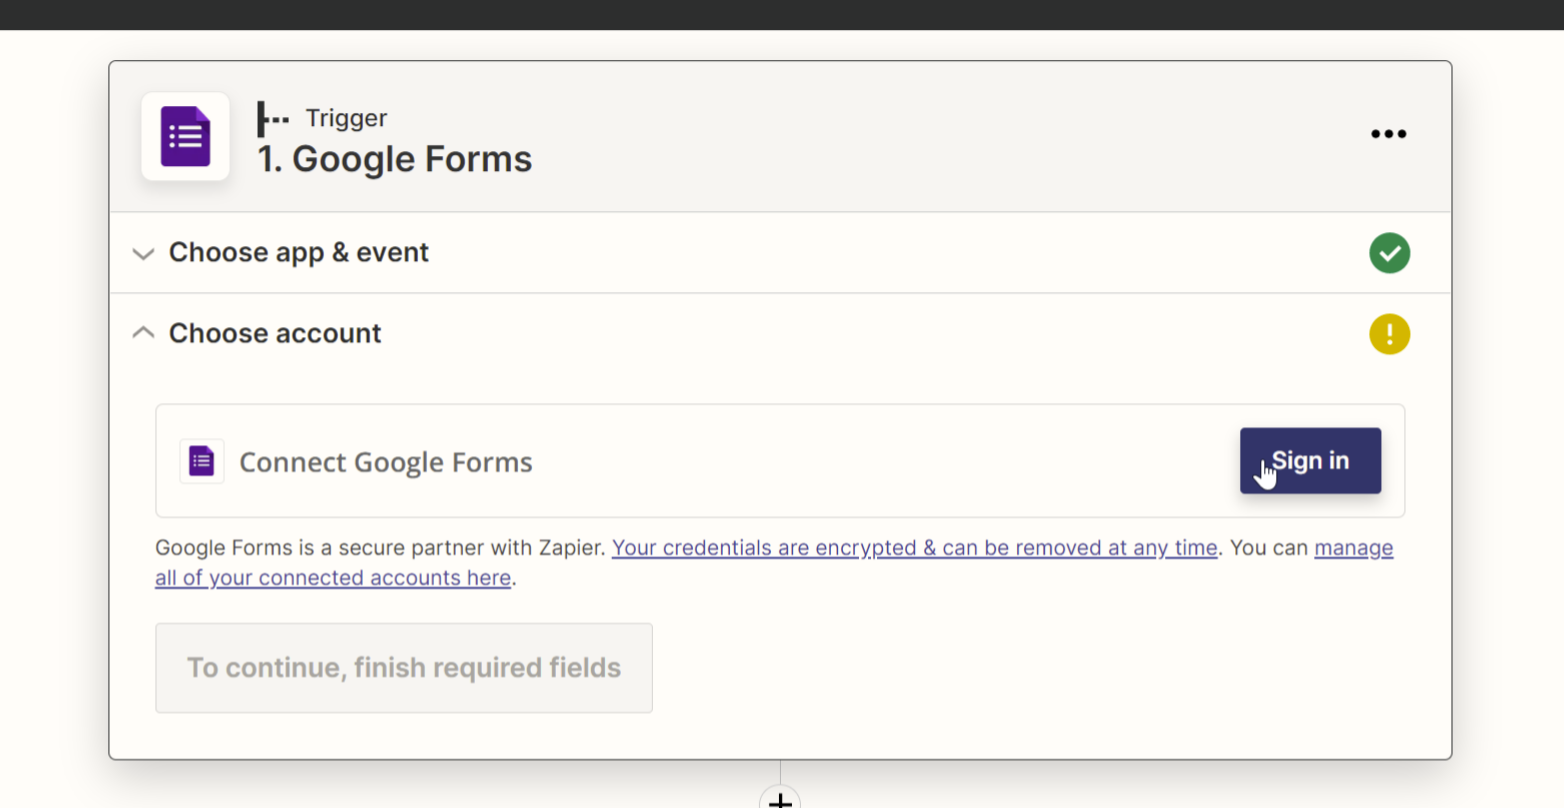
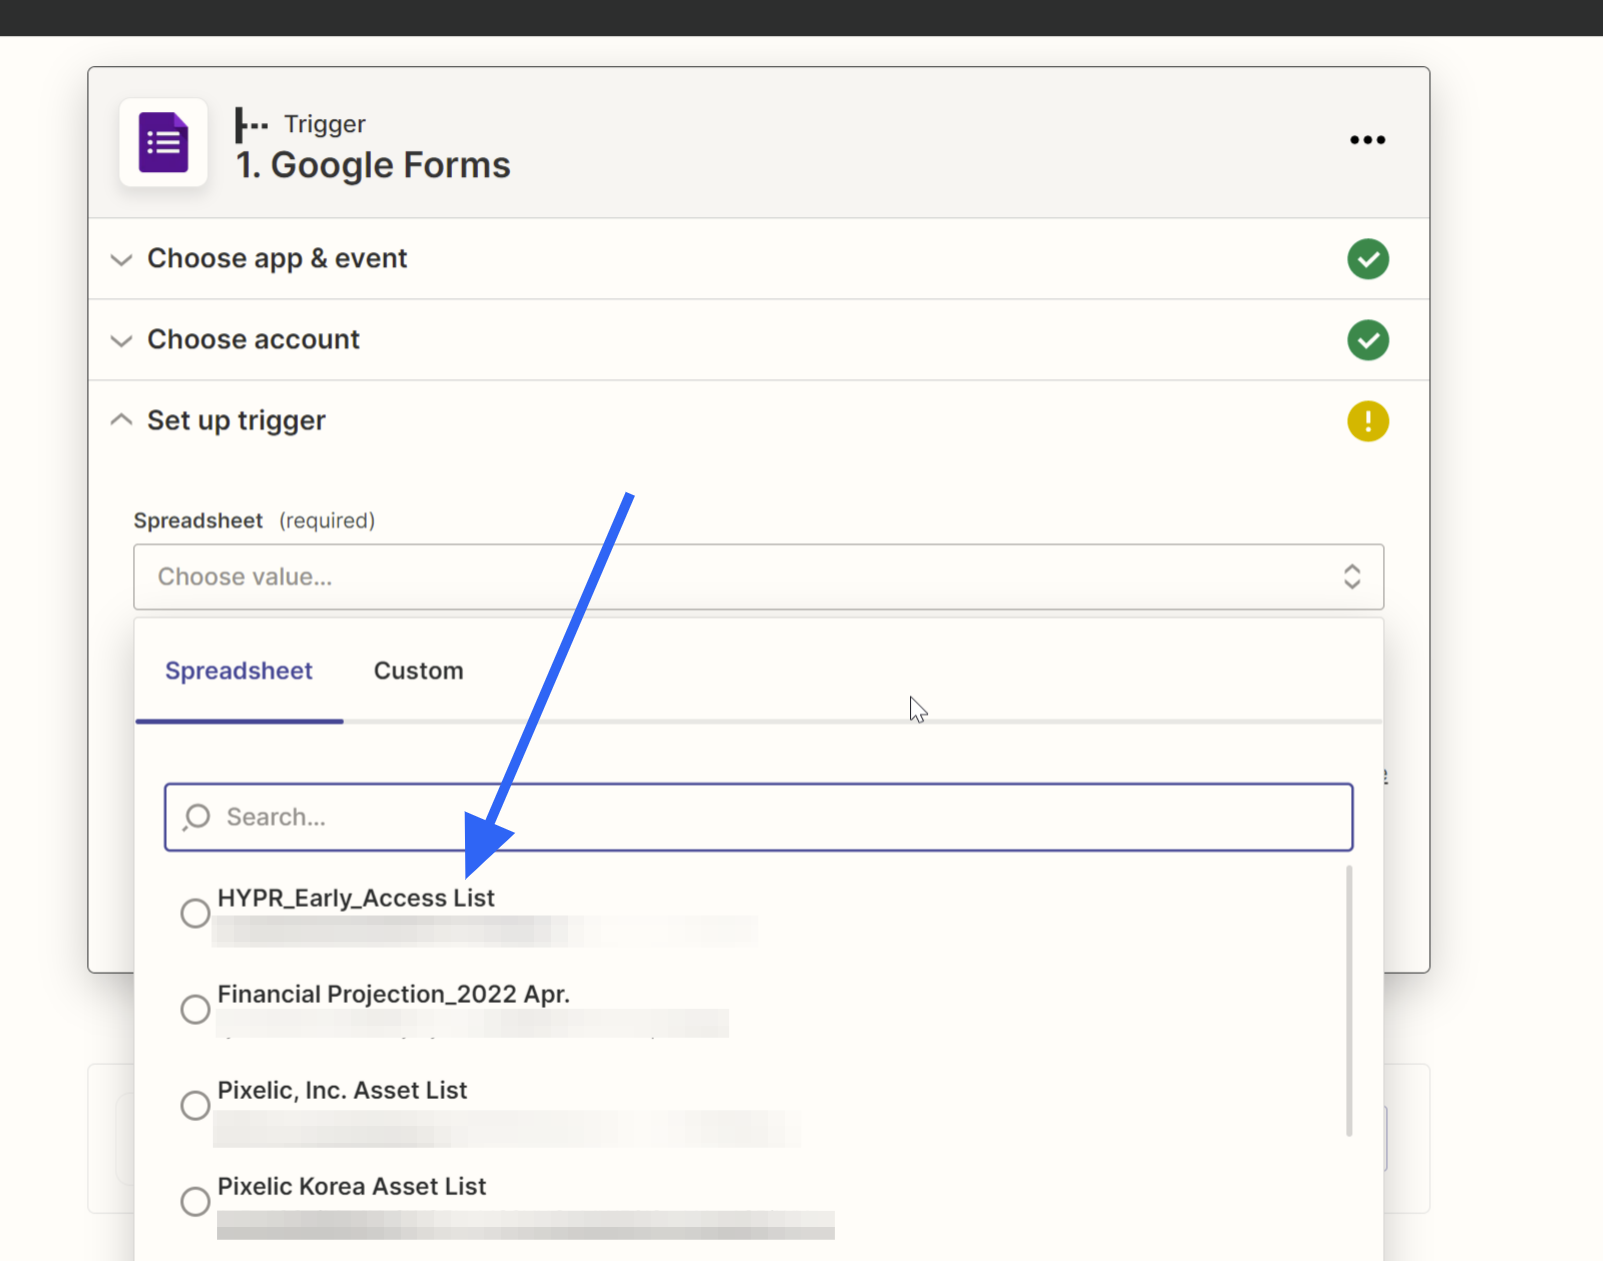
First, search for Google Forms in the Trigger menu.
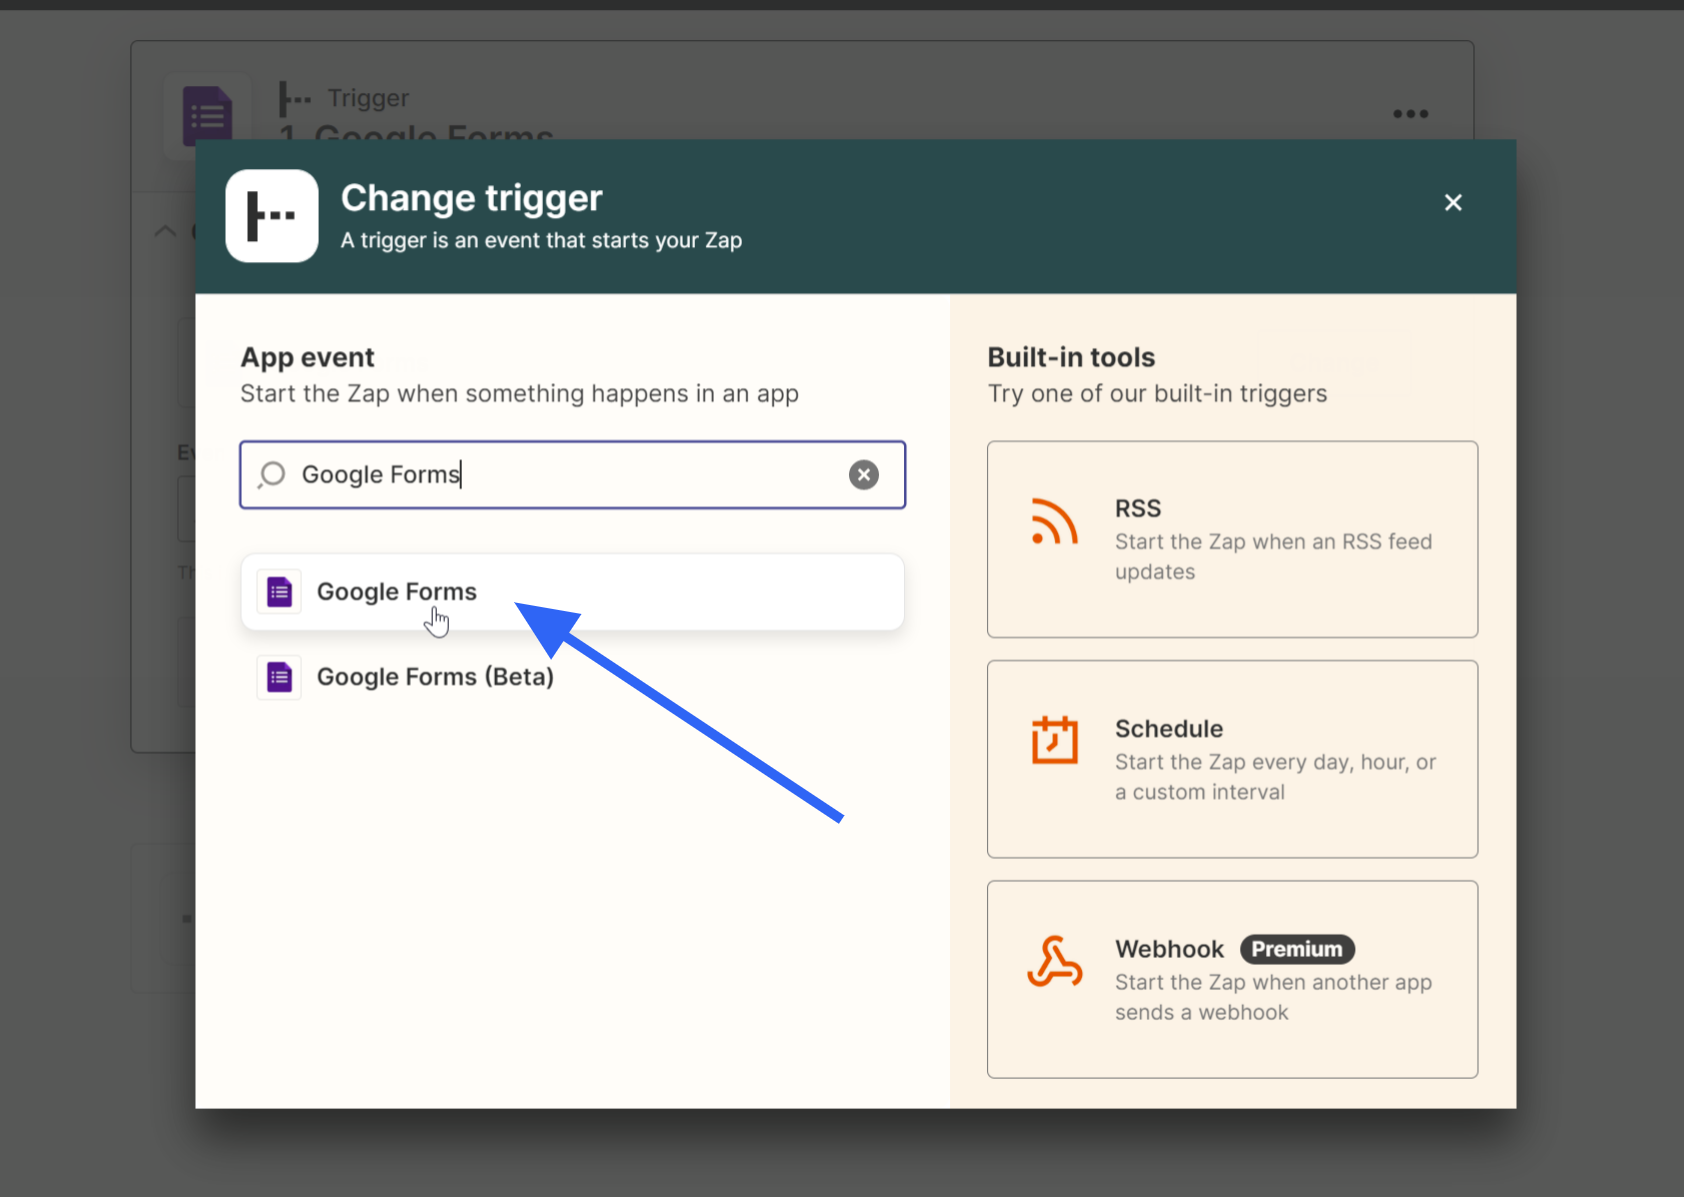
Add Trigger

Select “New Response in Spreadsheet” as a condition to trigger the Zap.

New Response In Spreadsheet

Sign into Google Forms and allow Zapier Integration.

Sign into Google forms

Sign into Google forms part two

Select a form to connect with Relate.

Select a form to connect

Select the worksheet in the same way.

Check if the data is correct through Test trigger.

Test trigger

If you see âś… on the Trigger tab after clicking 
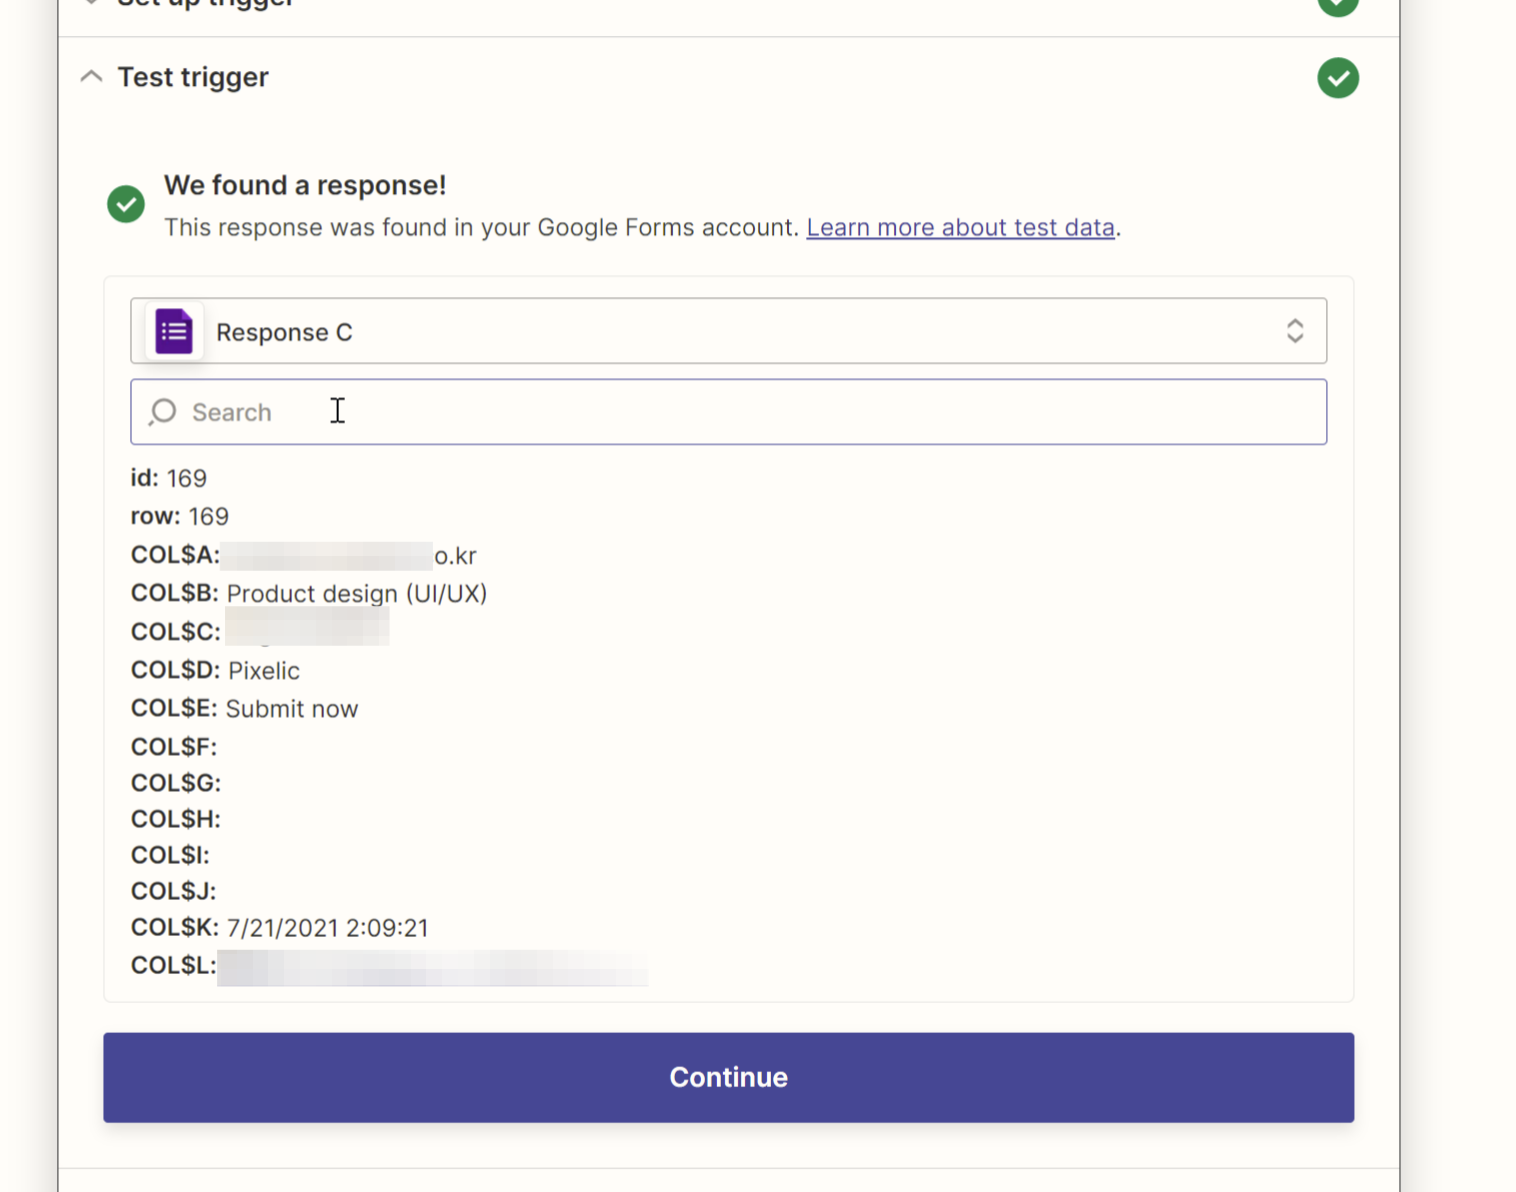
Continue, it means that the connection was successful.
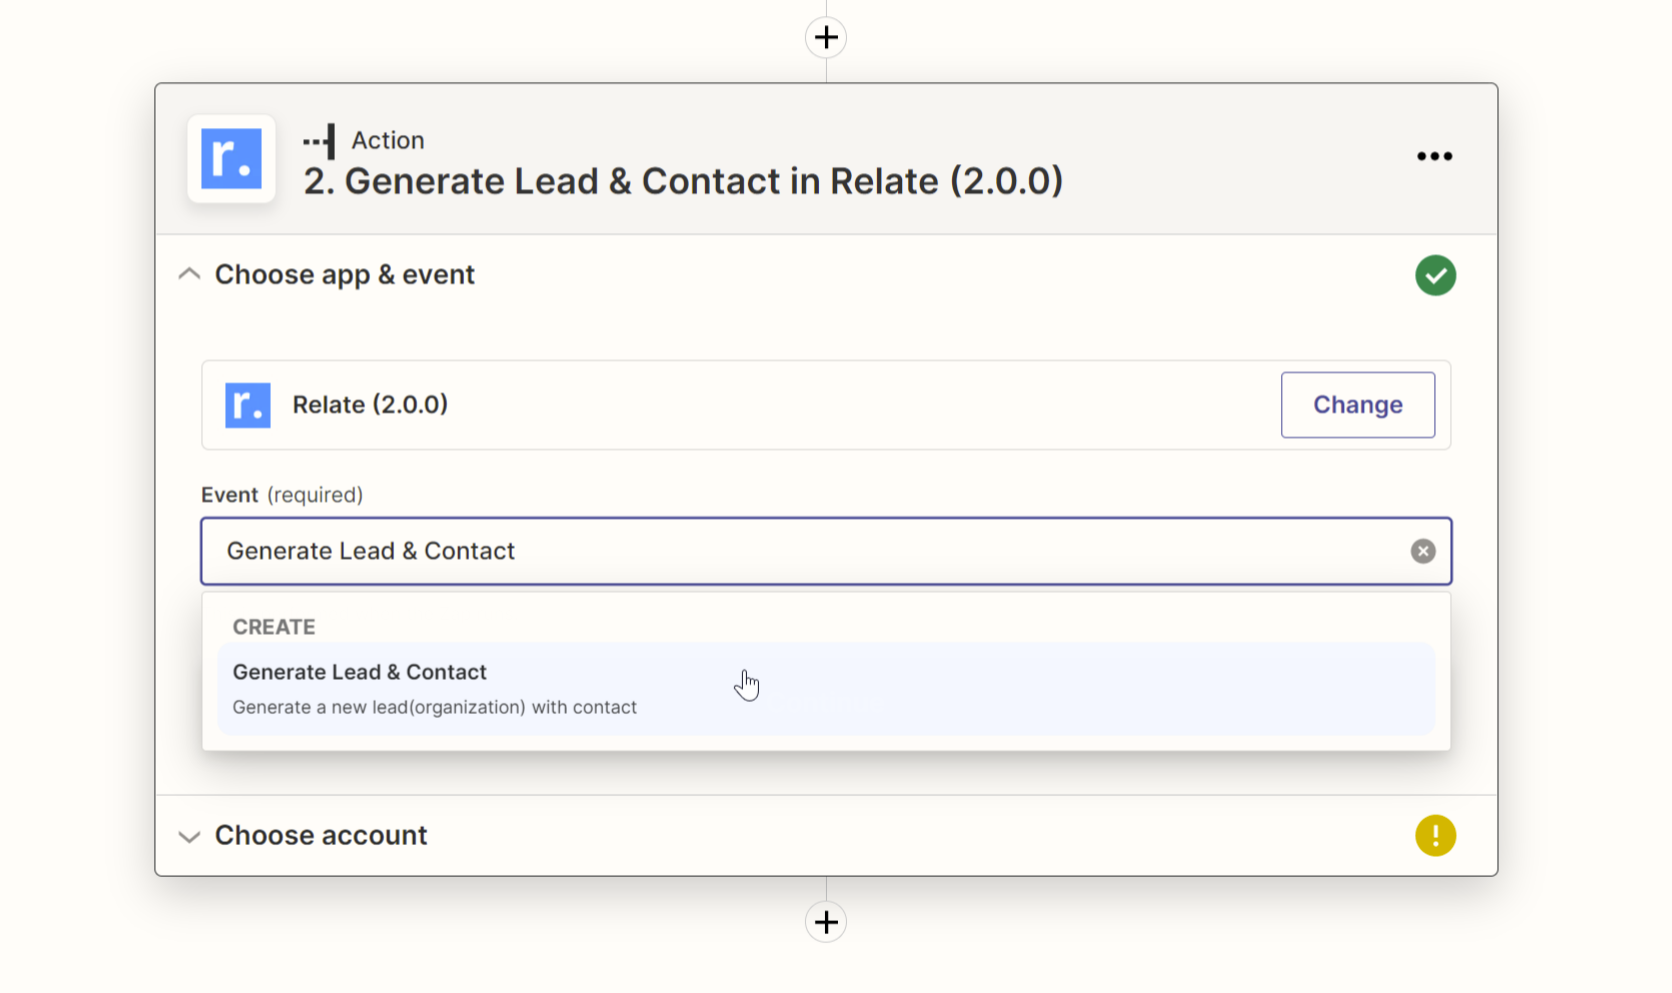
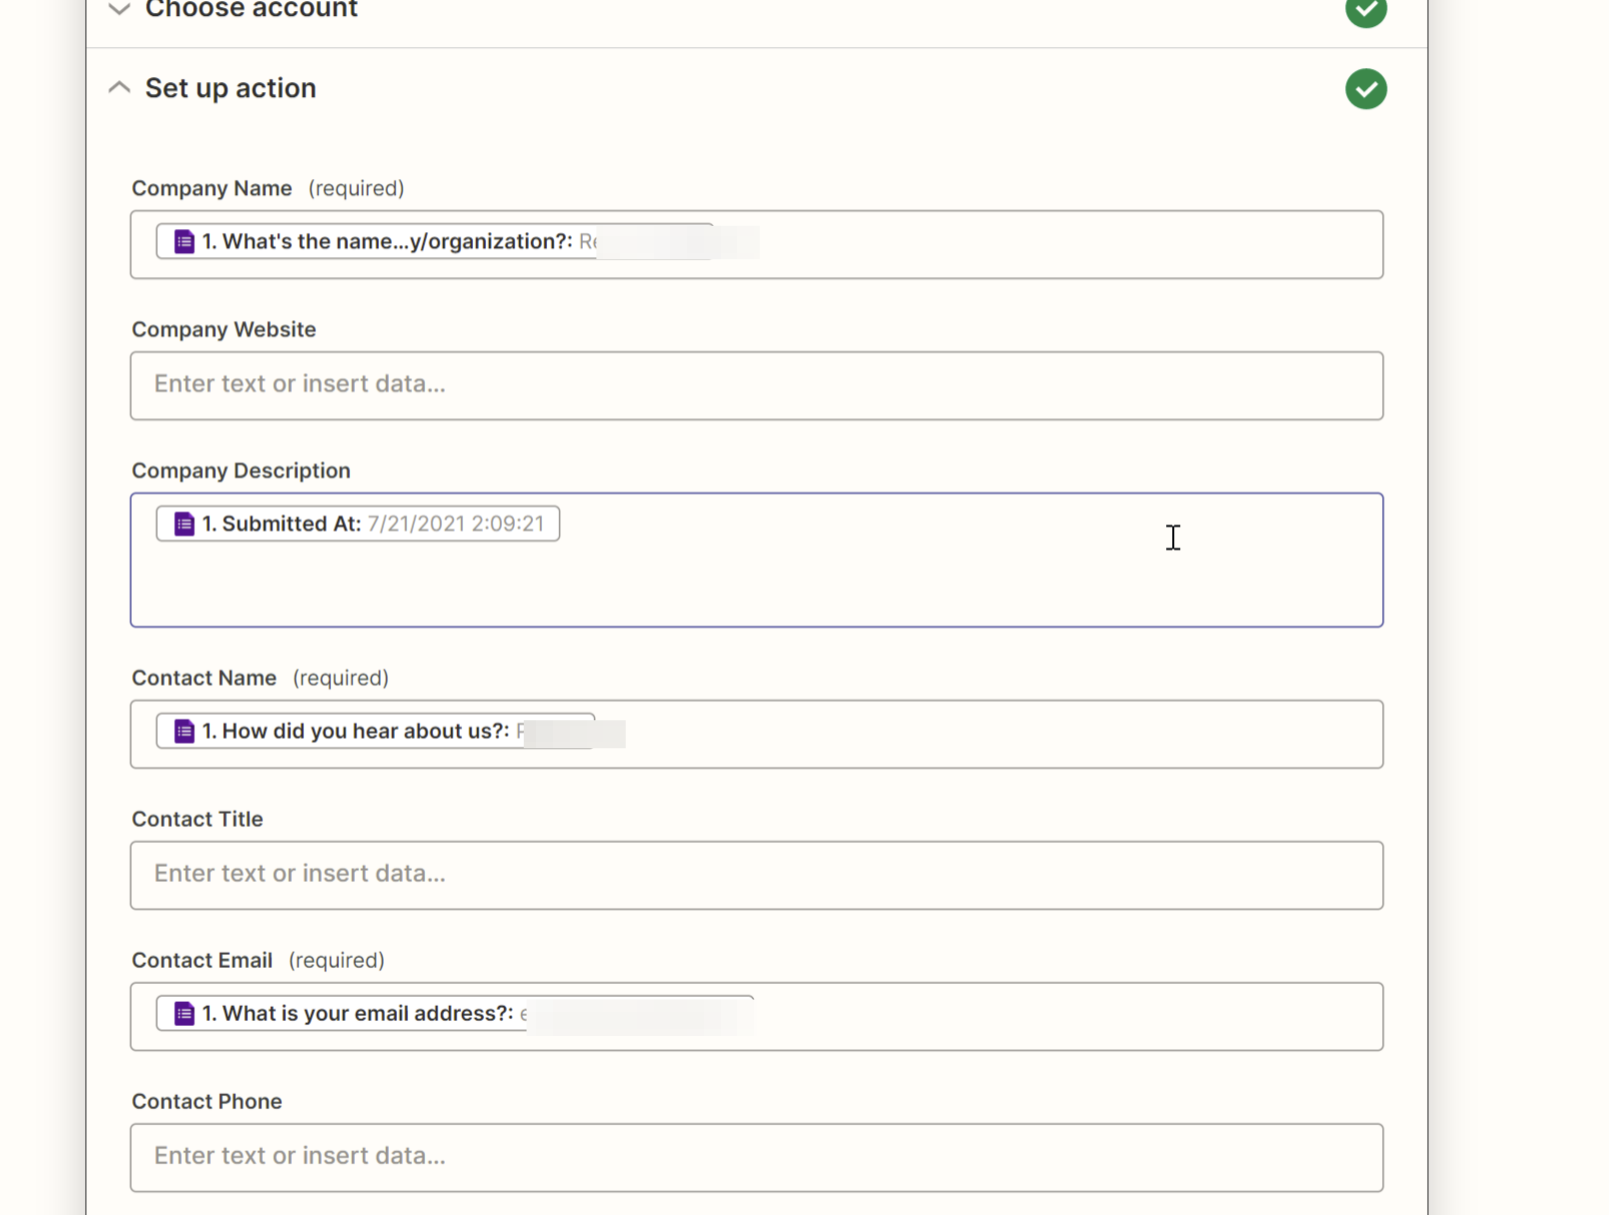
4. Setting Action

Click the Action tab and search for Relate. Make sure to select `Relate (2.0.0) Latest`
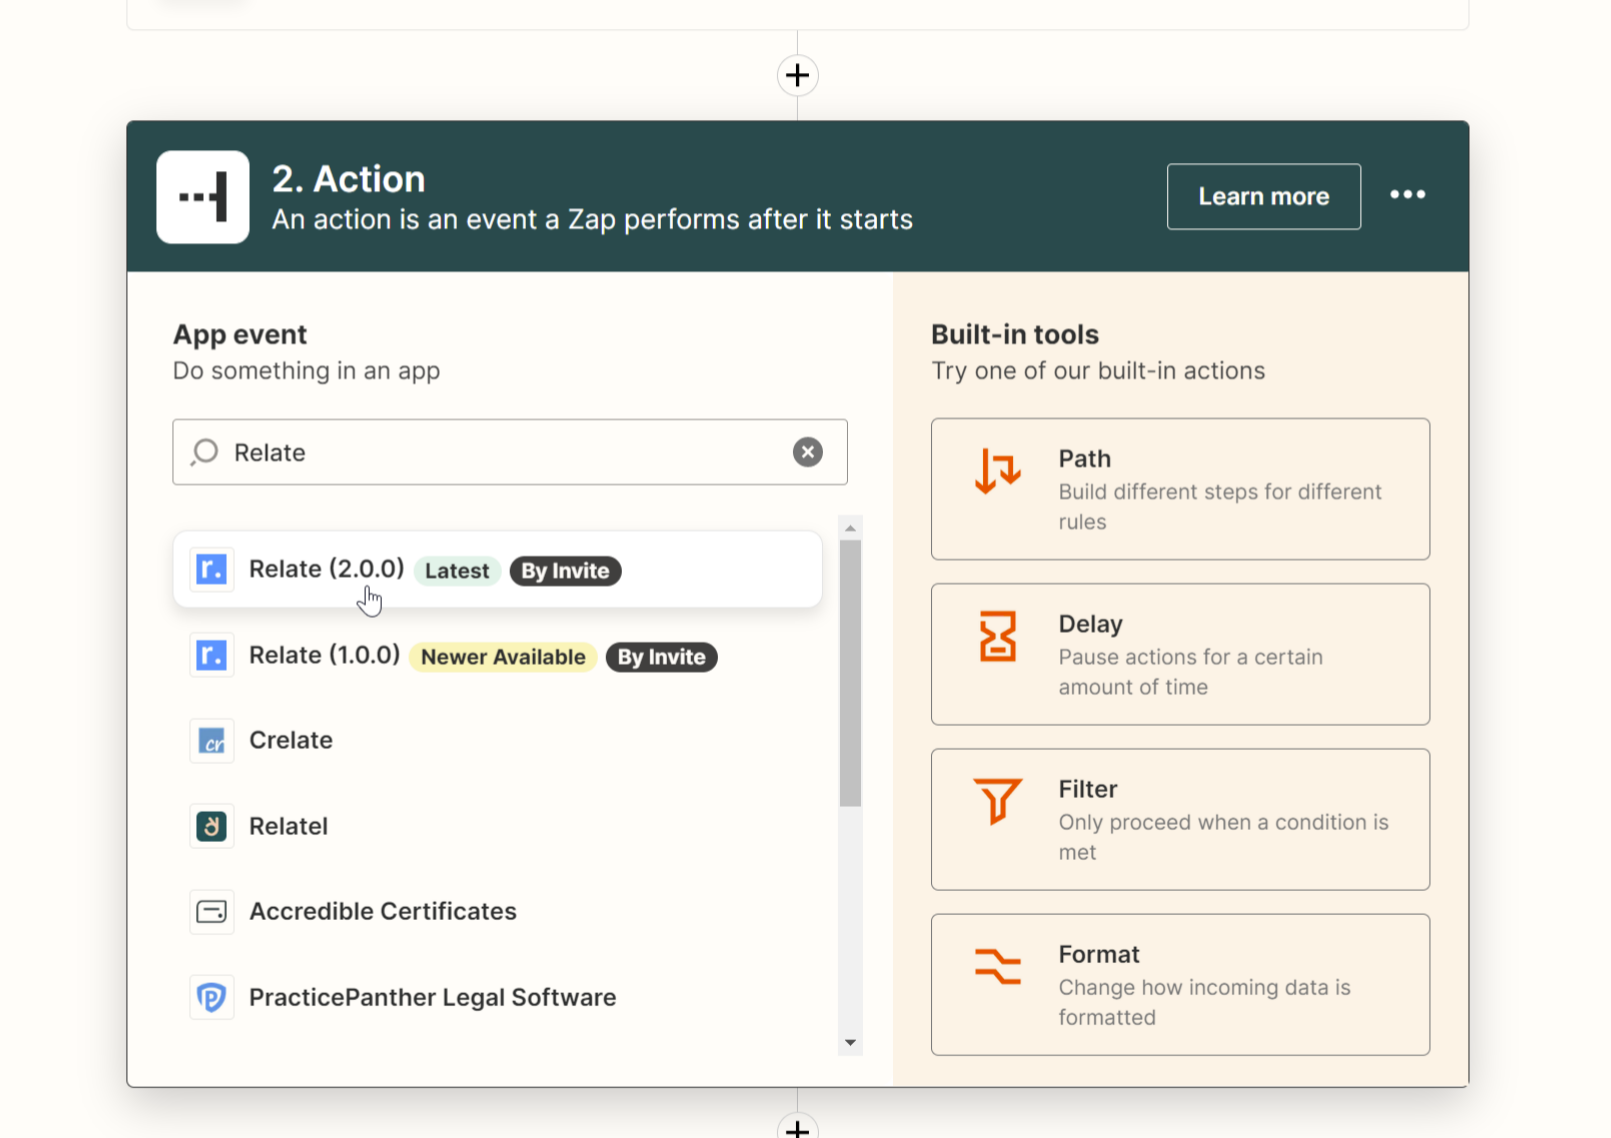
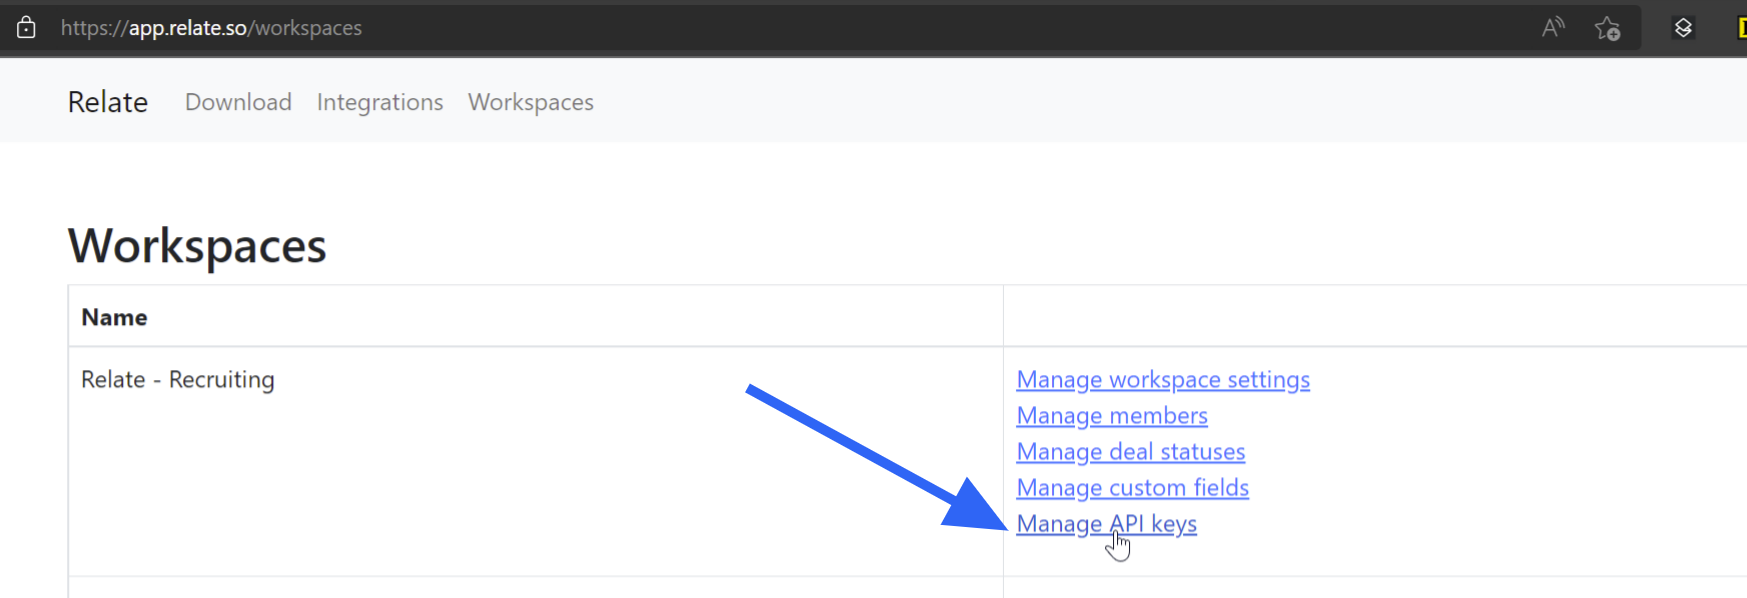
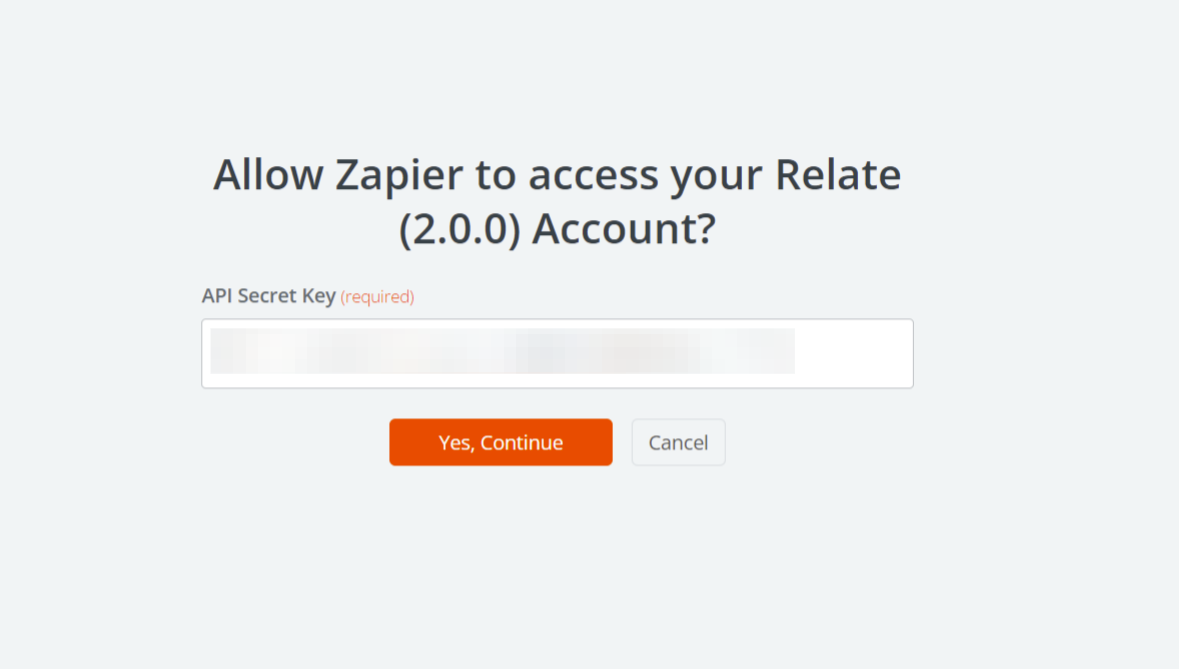
Setting Action

Select Generate Lead & Contact.

Select generate lead and contact

At this time, a new window will appear asking you to enter the API Key.

Now, go to API Page in the Relate settings page of the workspace. Select Manage API Keys.

Manage API Keys

Generate API Keys

Click 
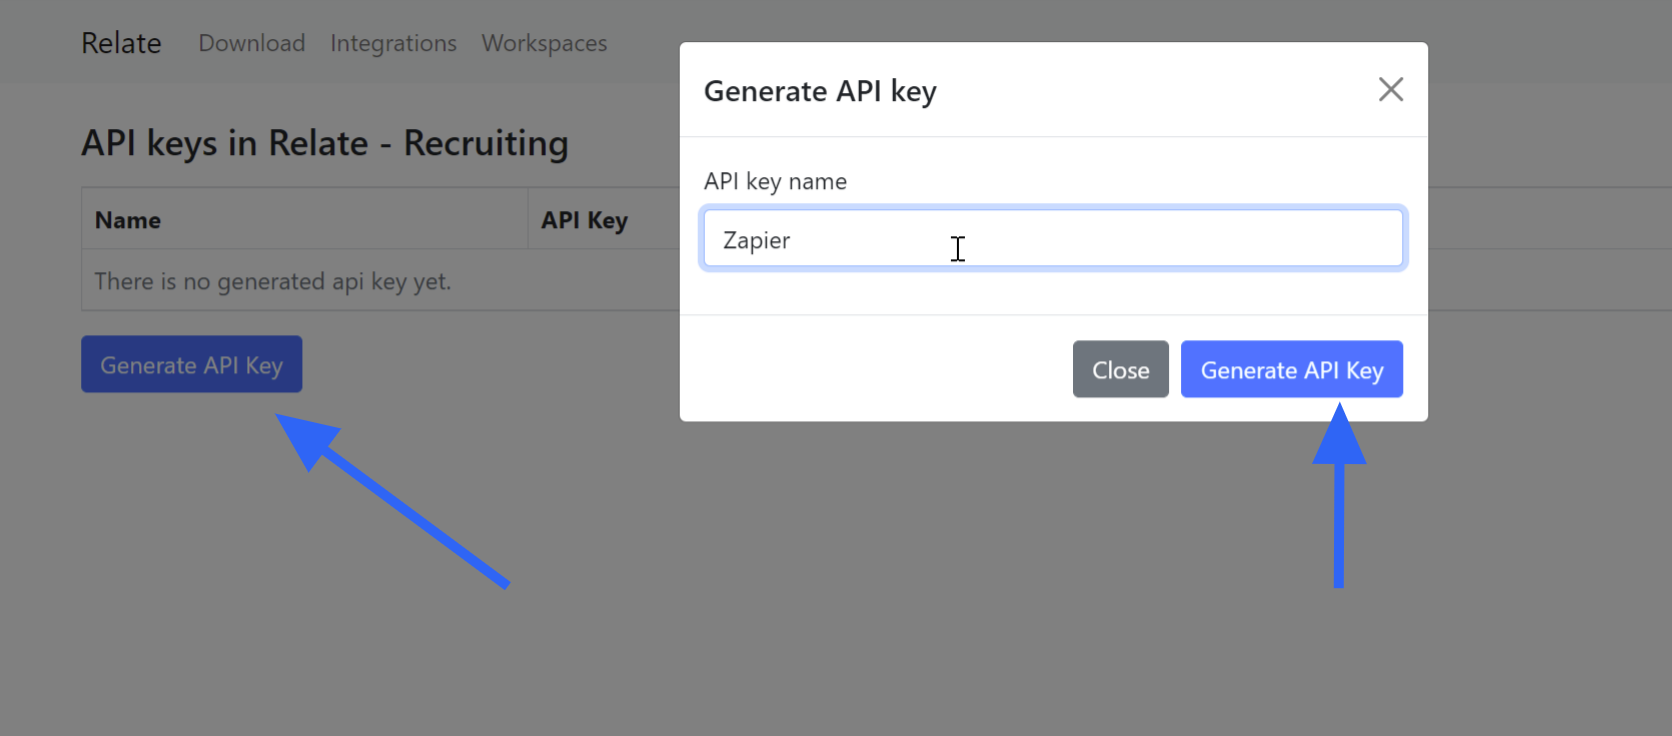
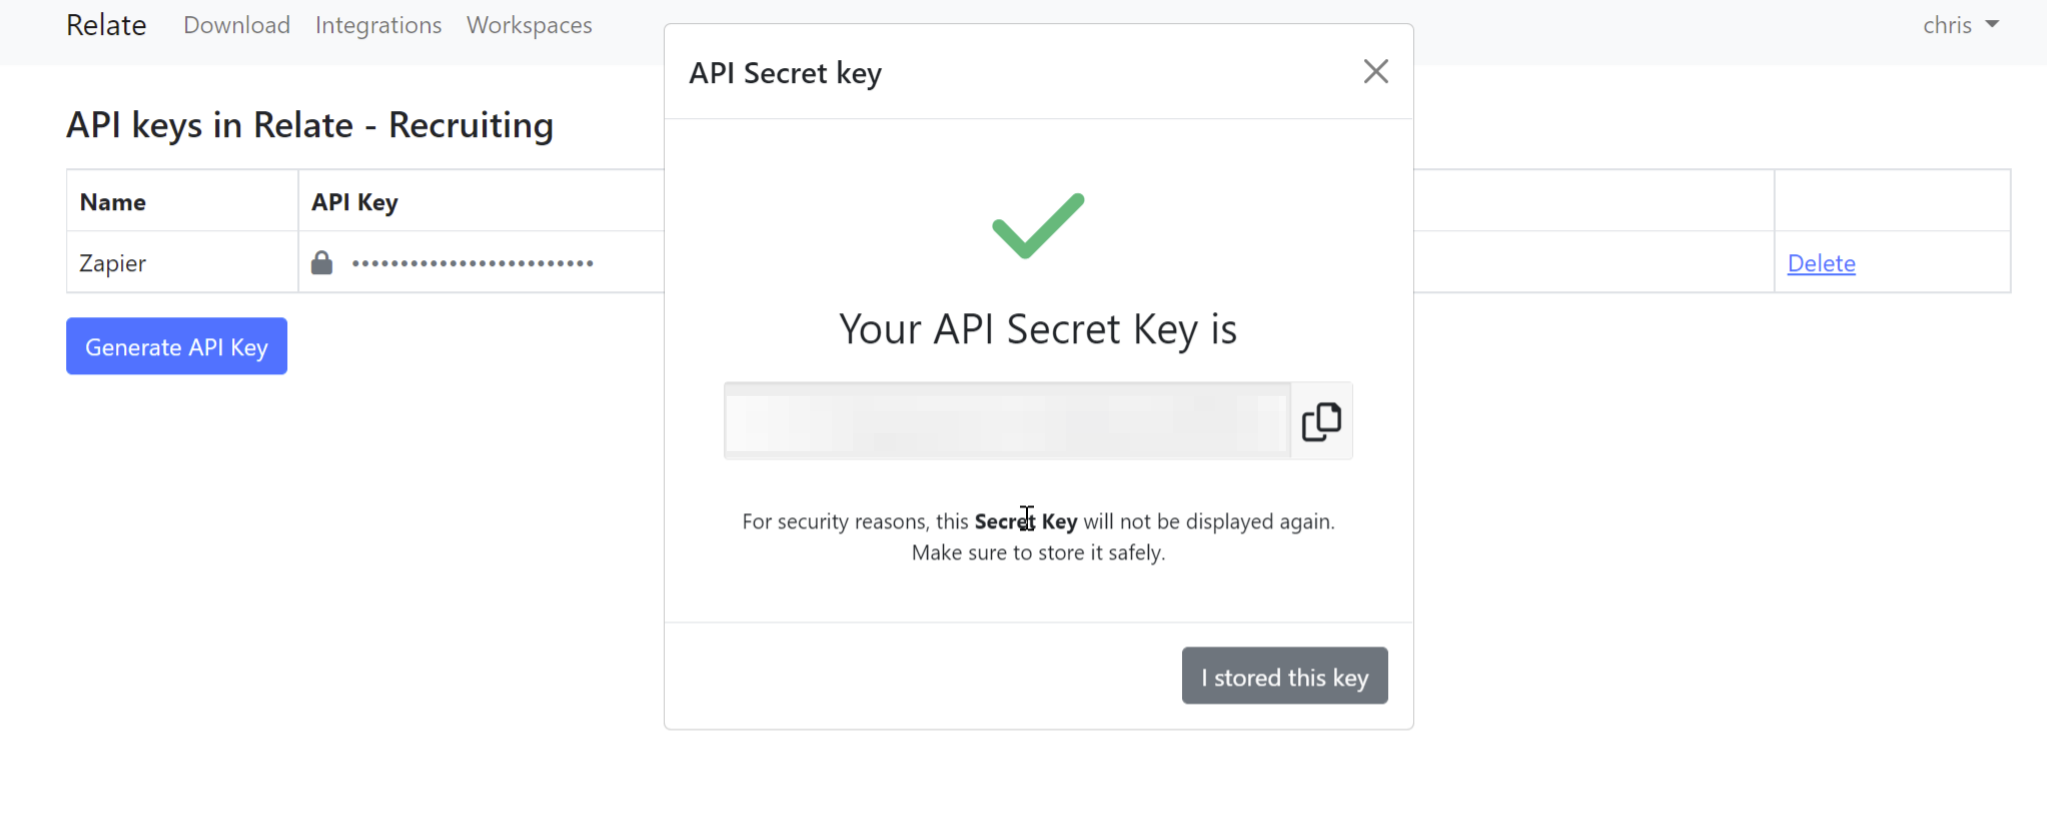
Generate API Key to generate a new API Key. Once you store the key, it will not be shown again for security purposes. So, please copy the key before saving it.

Copy Key

Paste the copied key into the API key input window that appears from Zapier and continue to complete the Relate API connection.

Paste Key

Match the information from Google Form to the data fields in Relate Lead/Contact/Deal/Note as shown below.

You must enter the required information to proceed to the next step. Required information is as follows:

  • Lead Name (Company Name)

  • Contact Name

  • Contact Email

We recommend putting all data in the Note field, so you can see the data in Relate CRM even if you can’t put it in the Relate Lead/Contact directly.

Also, since the newly created notes are shown in the Inbox, it will become a reminder for the team that a new lead has been created.

If you do not include any data for the deals, Deal will not be created. If you want to create a Deal when a new Lead and a Contact are created, you can enter information in the Deal-related fields (Example: Deal Assignee, Deal Status, etc.)

Deals data

Deals data part two

If you click 
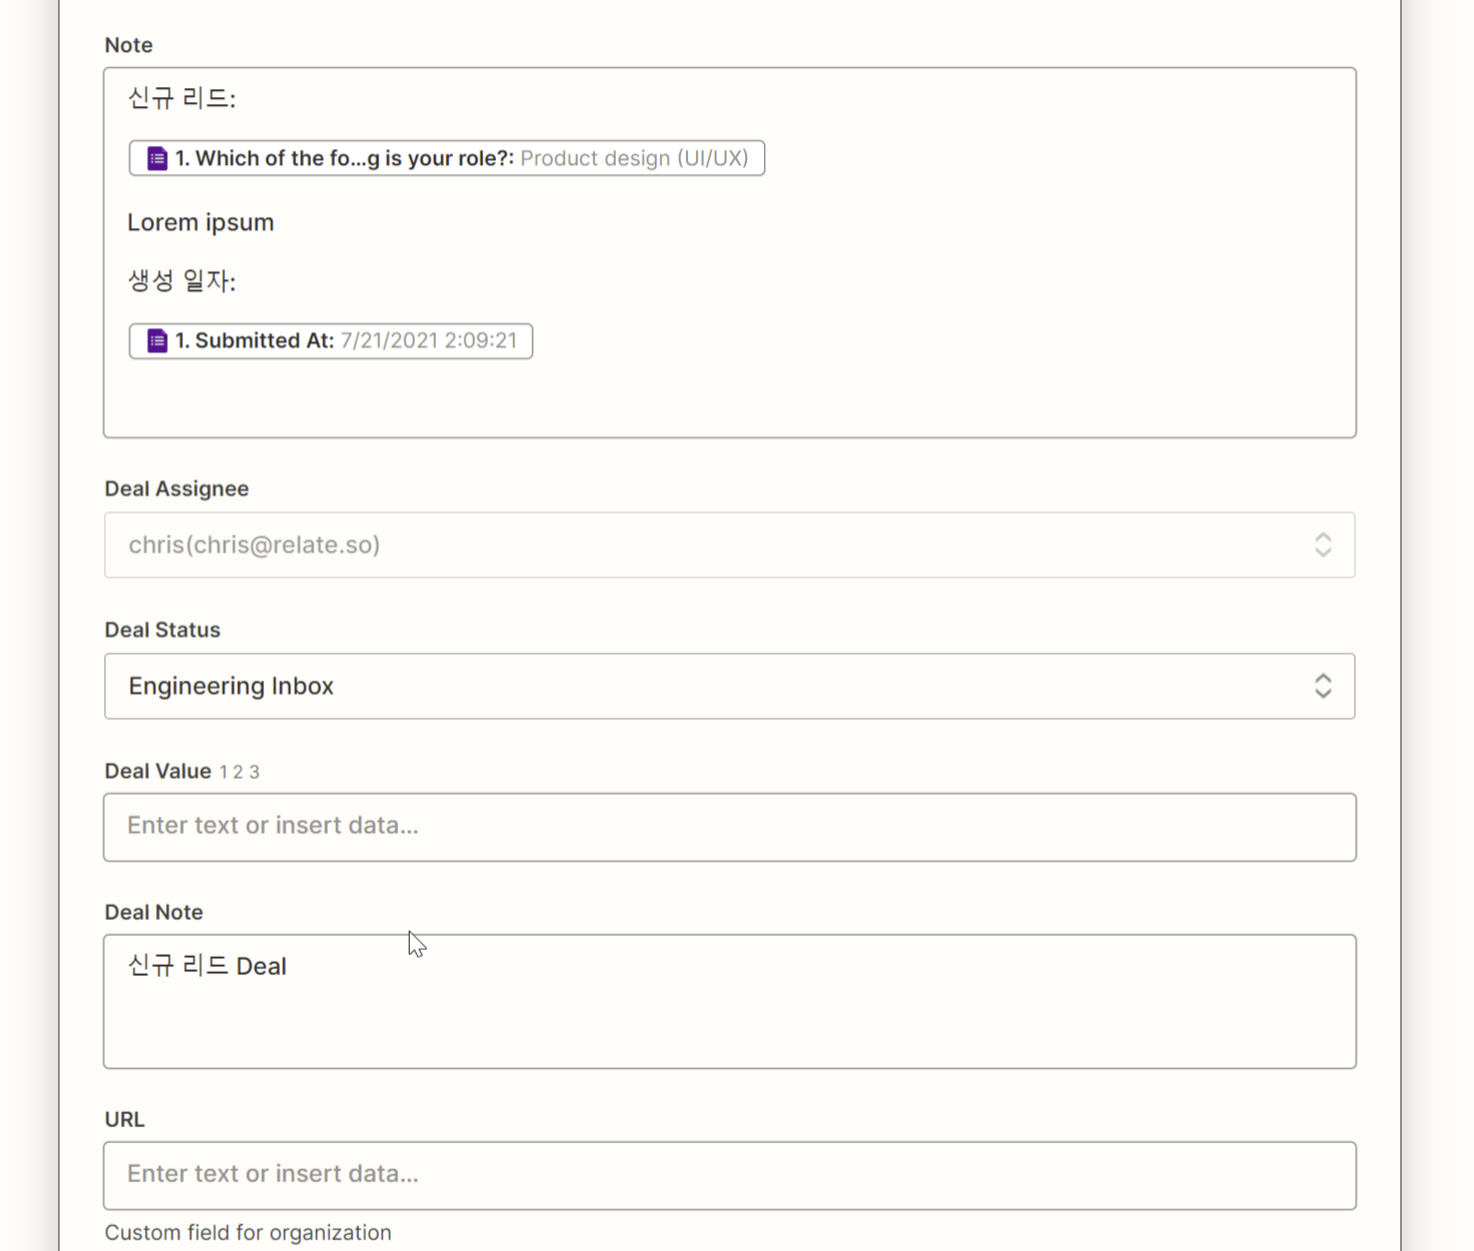
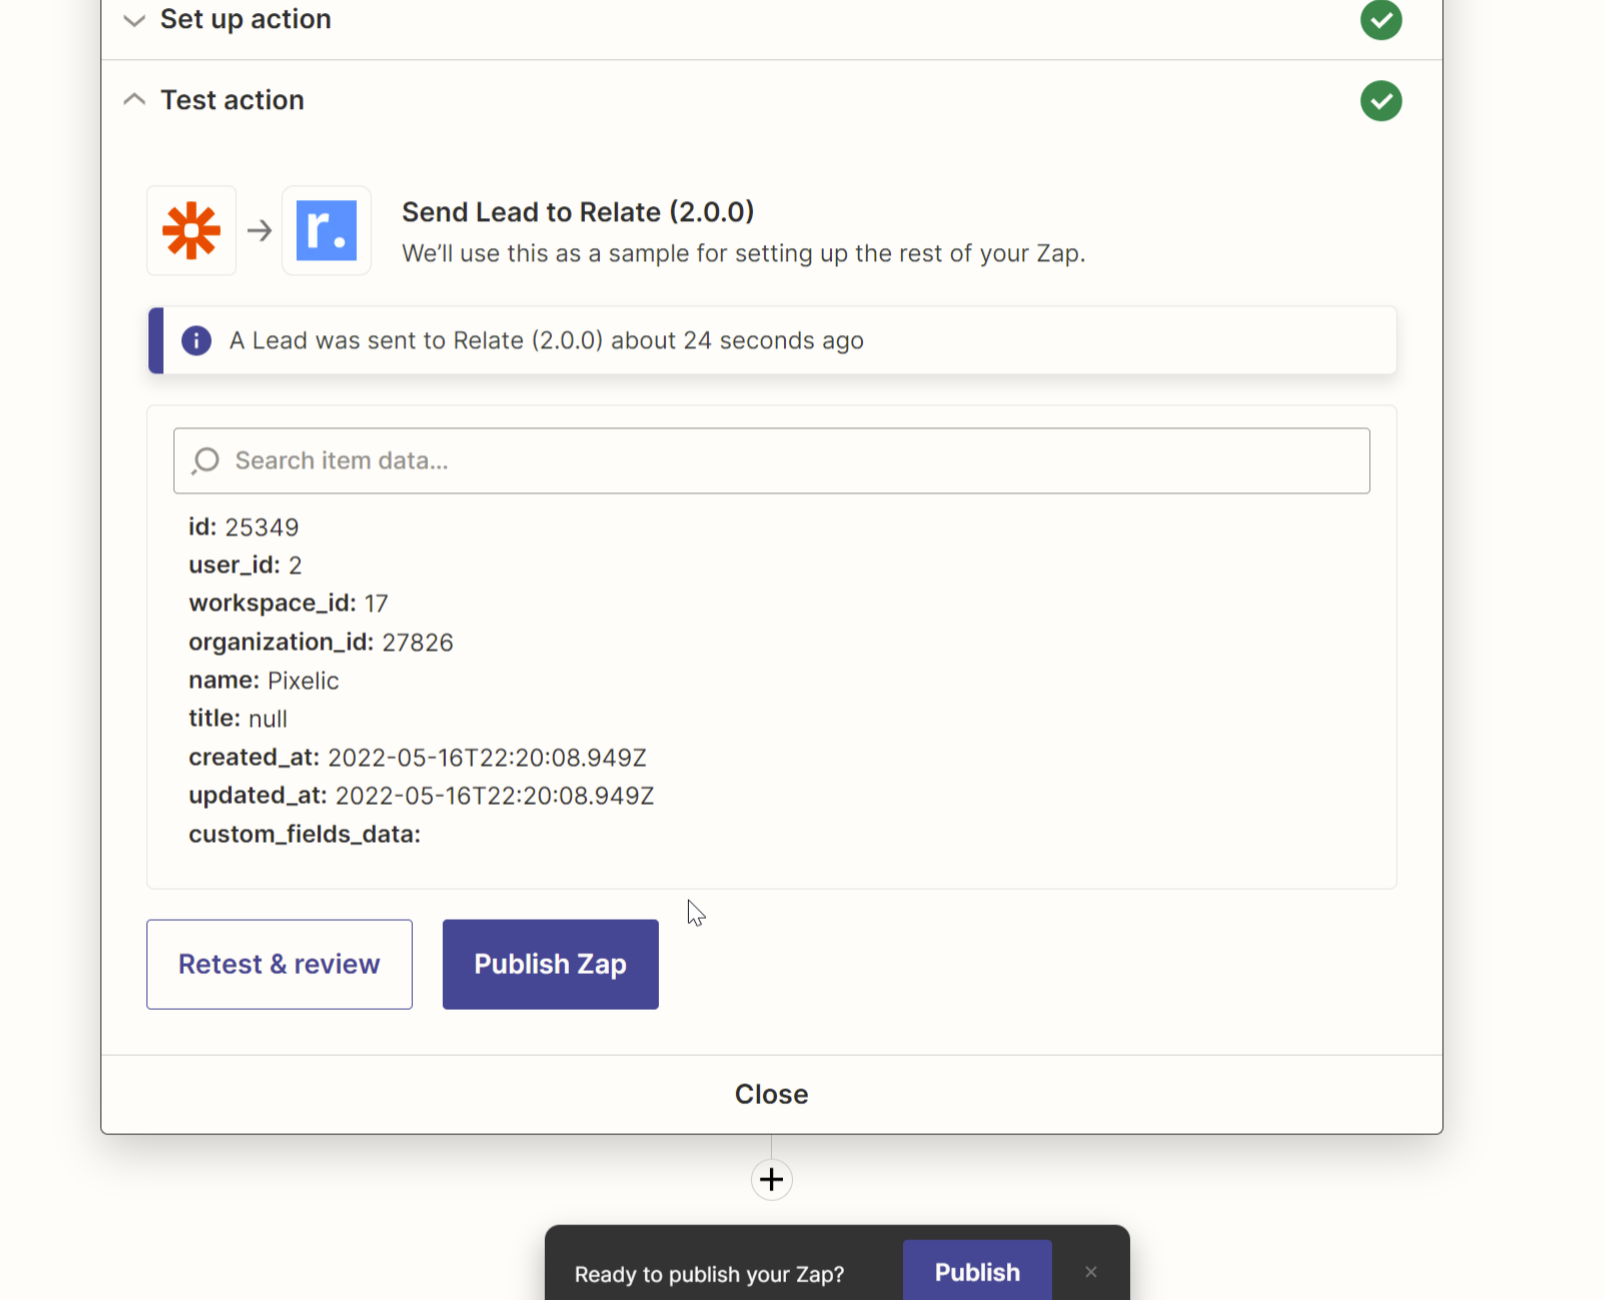
Continue, you will see a step where you can test action. The test sends the actual data to the Relate, so if necessary, you can delete it later.

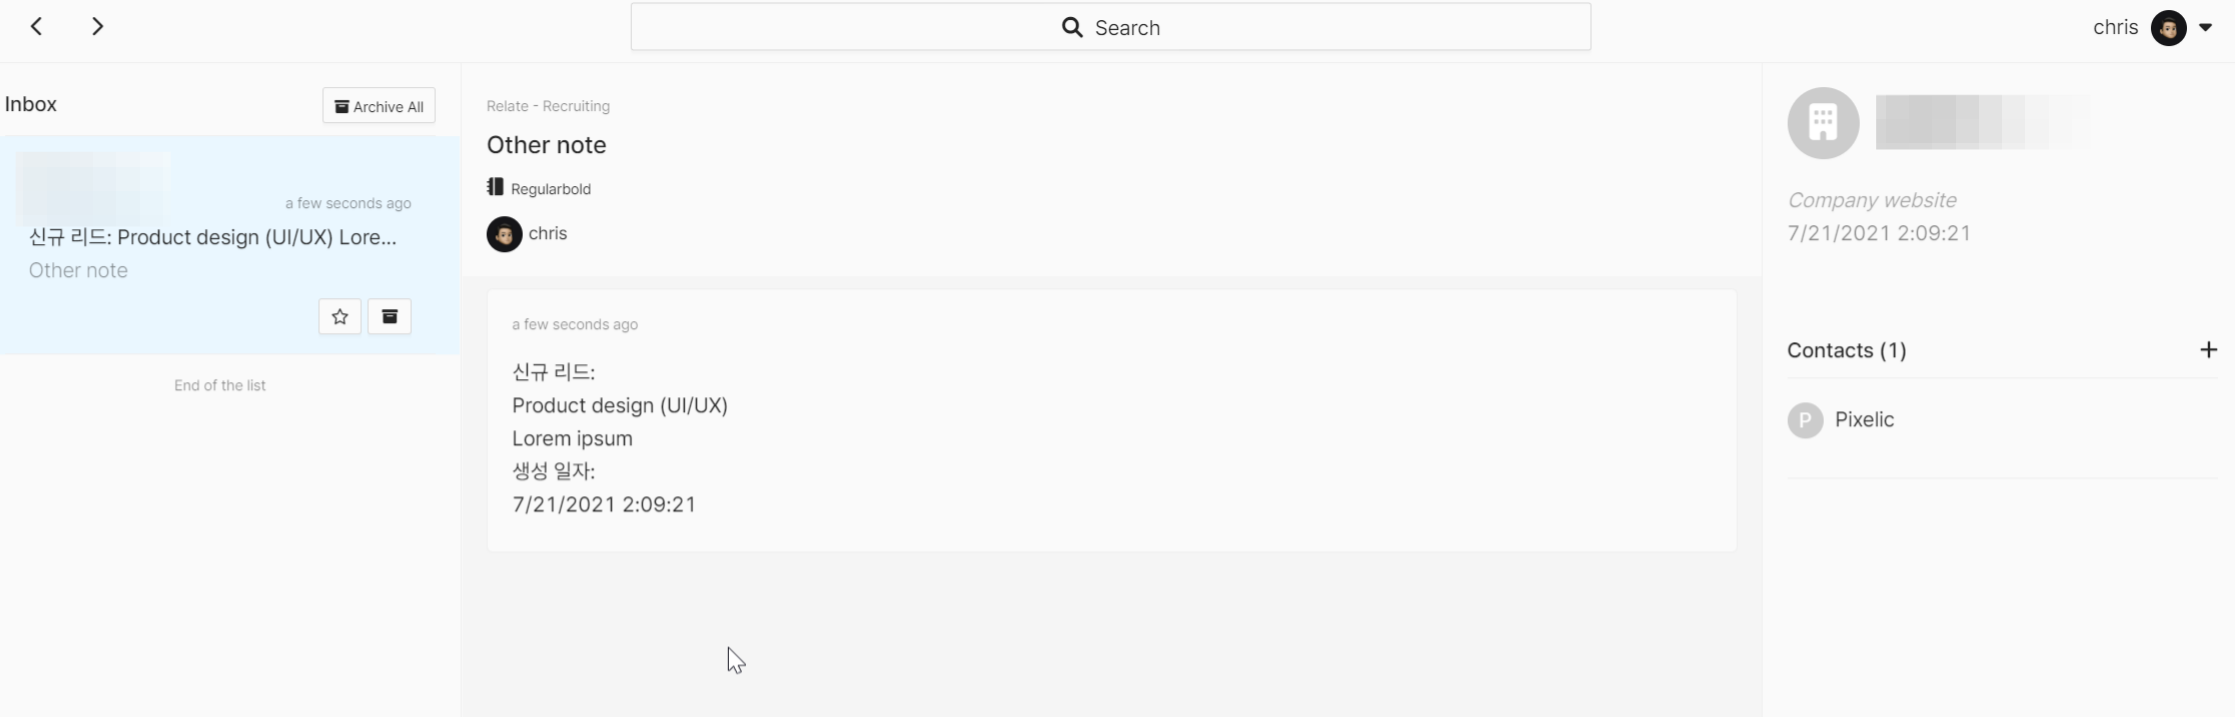
If the test is successful, you can check the data in Relate.

Check data in relate

Publish Zap

Now press Publish Zap to enable Zap. Finally, in the top left, you can change the title of Zap to make it more legible.