Email sync
Relate supports a full, bi-directional email sync.
Overview
Relate supports a full, bi-directional email sync between Relate and your choice of email service, such as Google Mail, Outlook, etc.
This means that you can send and receive emails directly from Relate, and all emails sent and received from your email service will be synced to Relate.
Get started
Connecting your email account
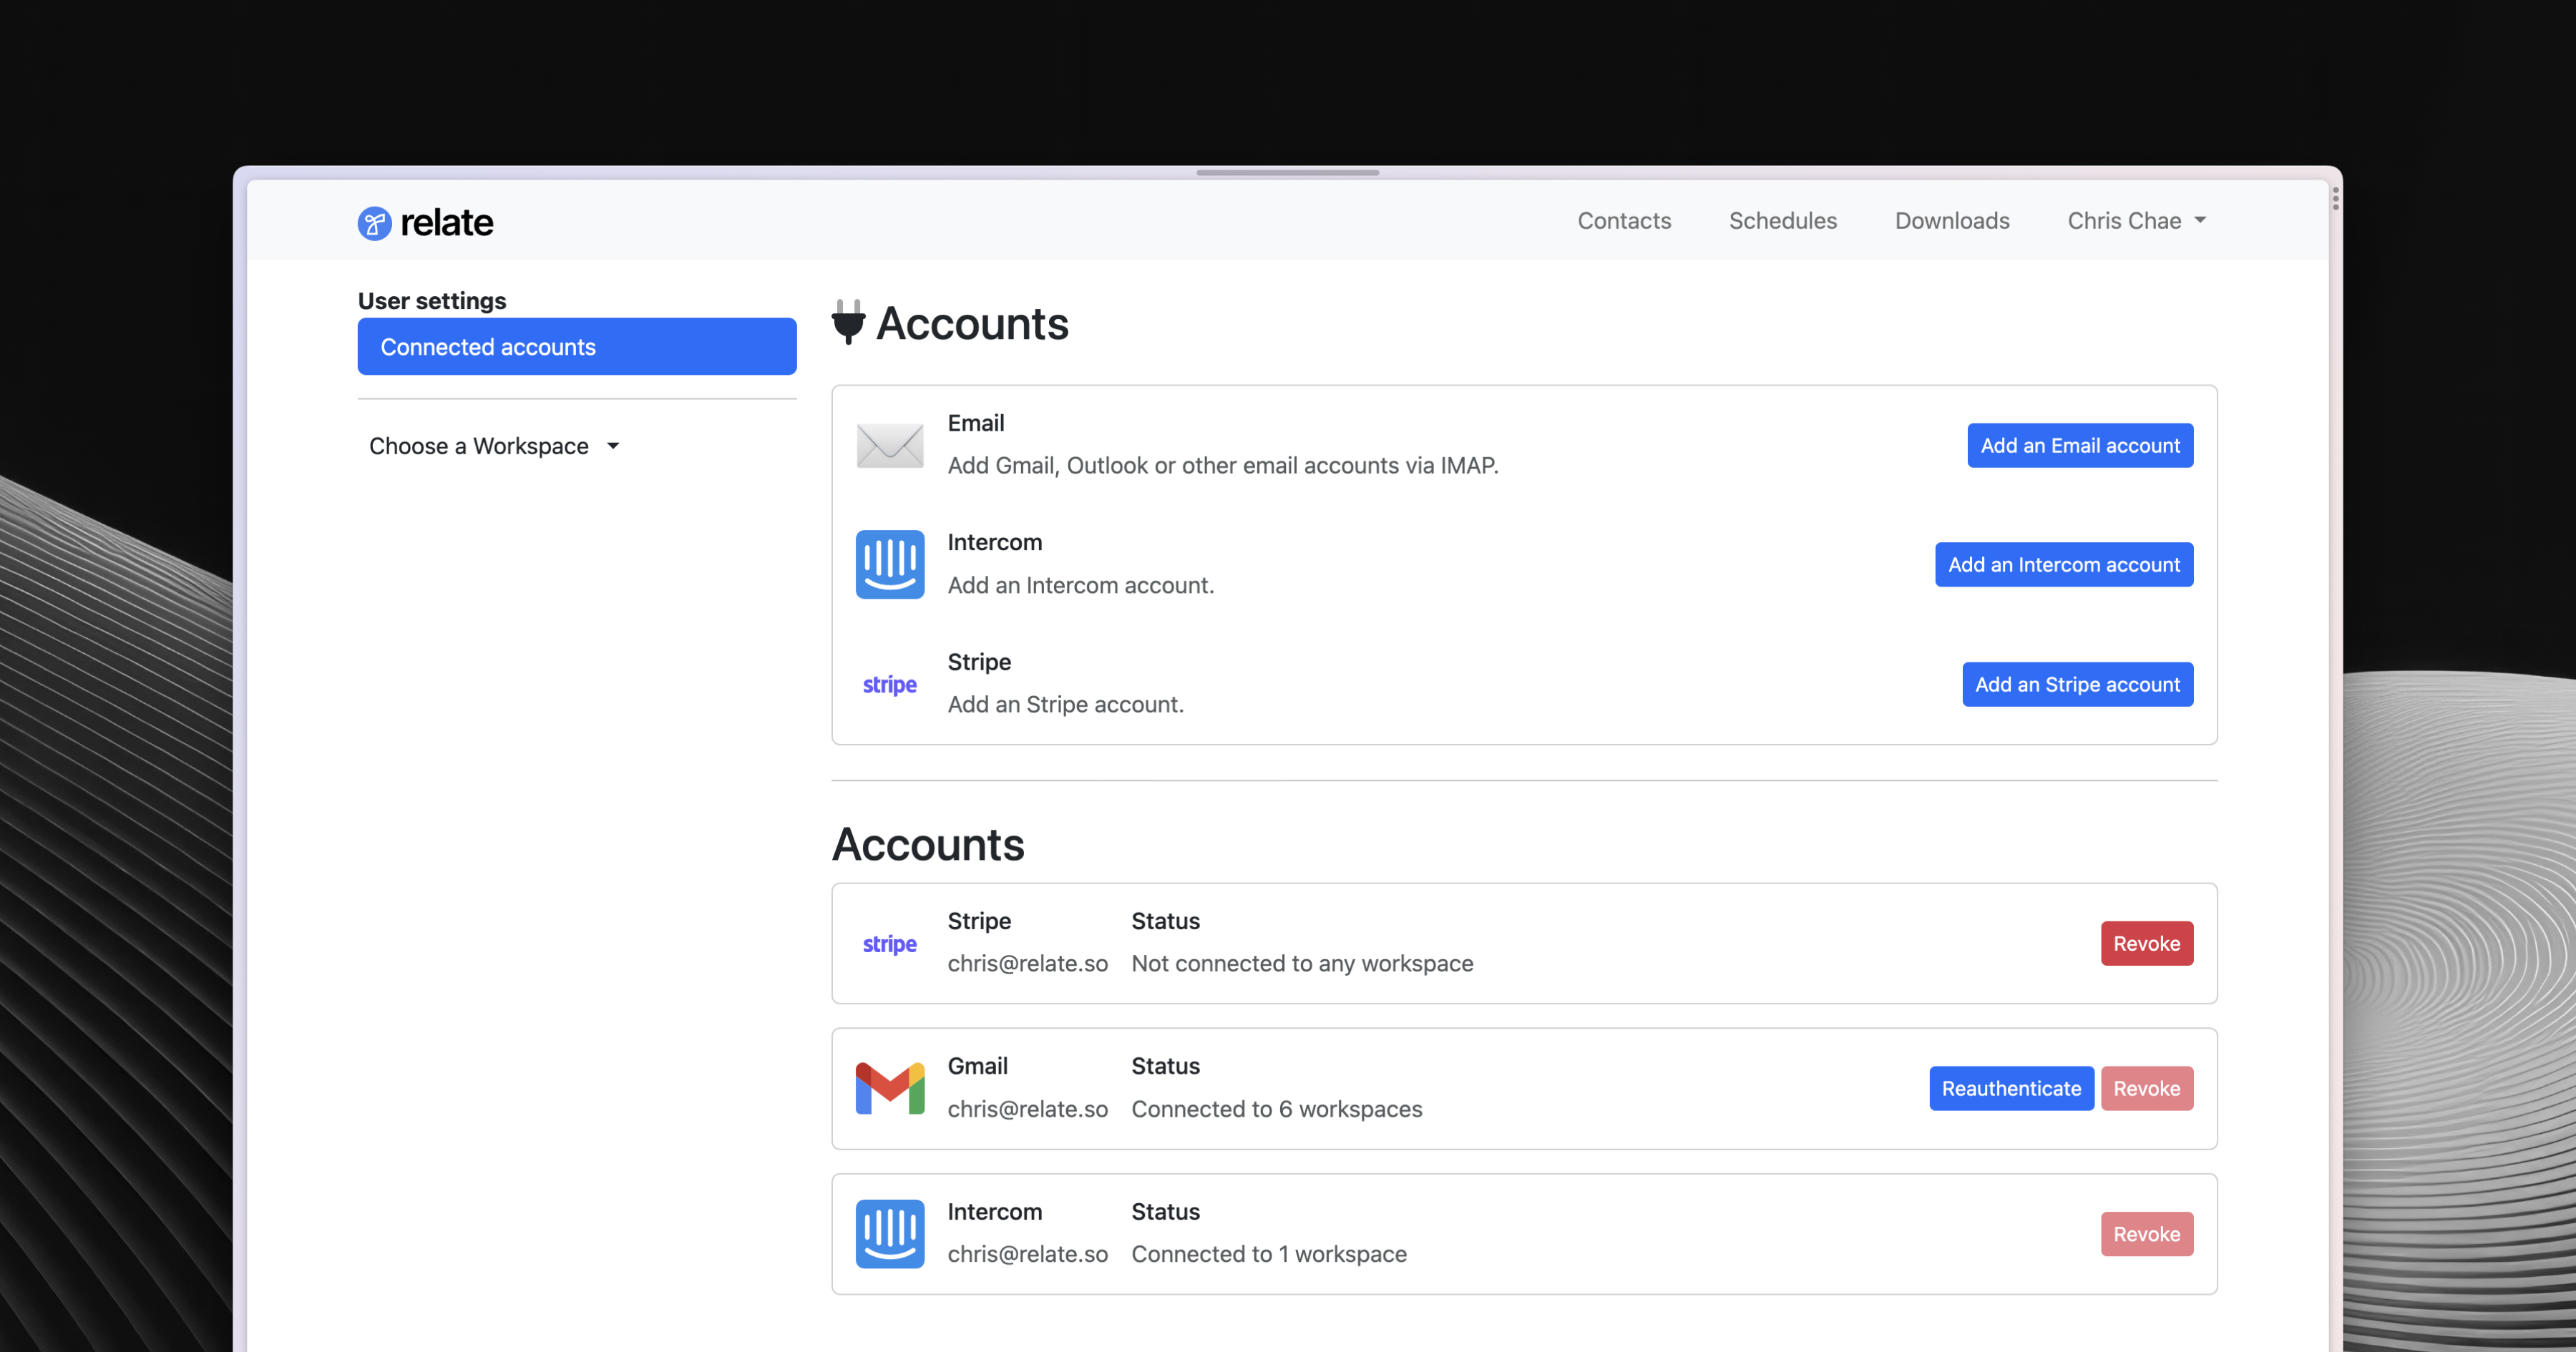
To connect your email service with Relate, go to the User connected accounts page in the Relate Admin.
Then, click Add an Email account. Enter the email address you want to connect, and select the email service you use (e.g., Google, Office365, Outlook Exchange, etc.).
1. If you are using Google Workspace, you will be directed to the Google email link page without selecting an email service. (see screenshot below)
2. If you select Other (e.g., Yahoo, etc.), please follow the IMAP/SMTP connection procedure.
Please follow the procedure provided on each email service link page to complete. Then, follow the Creating Connections for each Workspace.

IMAP/SMTP Connection
If you have already connected your email through Google and Outlook, skip this step and go to Creating Connections for each Workspace.
Enter your email address/password
Please enter your email address and password to connect as shown below.

Entering IMAP/SMTP information
IMAP and SMPT host addresses and Port/SSL numbers have unique values for each email service you use. This information is usually on the Admin page, or in the email service customer center/support article.
In this guide, IMAP/SMTP information of NAVER Works is used.

After entering the information, click the Sign in button to complete the connection.
If you see Reauthenticate button on your Accounts page, the email account is successfully connected.
Now, you need to create a Connection for each Workspace. Proceed to the next section.
If Two-factor Authentication (2FA or MFA) is currently set in your email account, temporarily disable it and complete the procedure.
Creating connections
To connect your email service to a Workspace, navigate to Admin > Integrations > Email.
Select the Workspace you want to connect to, and click the Connect to workspace button.
Advanced
Changing your email account password will disconnect your email connection
If you change your email account password, your email connection will be disconnected. If you changed your email account password, you can reconnect your email by following the steps above.
Using Relate with Two-Factor Authentication (2FA/MFA)
When Two-Factor Authentication (2FA/MFA) is set, you’ll need to temporarily disable it before connecting with Relate, and then connect again.
If your email service (e.g., Outlook, O365, iCloud, Yahoo!, etc.) allows you to create an App Password, you can use it instead of your existing password.
Here are links to settiing up App Passwords for each email service: